3. CONTROLLING WATER LOSSES IN PONDS
3.0 Introduction
|
| 1. In a previous manual in this series (Soil,
6), you learned how important it is to select a site with suitable
soil for a fish farm. A good choice makes it possible to build ponds
with strong impervious dikes and with relatively impervious pond bottoms
(see also Pond construction, 20).
2. It may happen that your fish pond is not as good as it should be.
Losing much water through seepage,
for example as much as 10 cm per day (see Section 2.1, Water, 4),
may be attributable to one of the following:
- the site, although known as less than satisfactory, had
to be used;
- the soil survey was not done well;
- excessive removal of surface soil for dike construction
has exposed
highly pervious areas of sand, gravel or rock;
- the pond was not well designed or constructed.
|
|
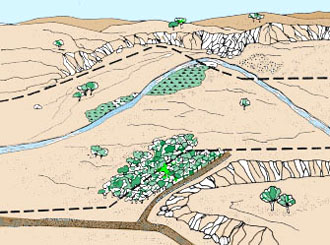
The selected site
|
| |
|
|
| 3. As well as losing water, excess seepage results in a continuing
loss of fertility. You should aim to reduce seepage to a point
at which water losses become at least tolerable, for example less than
5 cm per day. |
|
|
4. A newly built pond usually loses more water than an older pond.
As the pond is being used and well managed, the organic matter produced from
fertilization and feeding falls to the pond bottom, where it gradually blocks
the soil pores and so reduces the bottom soil permeability.
Note: if seepage losses are due to bad design or construction,
e.g. lateral seepage through dikes which are too narrow, the losses can be very
difficult to stop.
5. There are several methods you
can use:
- either accelerate at minimal cost the natural
process of sealing the soil pores; or
- if this is not possible, seal the pond bottom using additional material
at extra cost.
6. You will learn more about reducing seepage losses in the next sections.
Use Table 3 to select a suitable method
according to the quality of the soil to be sealed and the local availability
of materials.
7. In the final
section of this chapter, you will learn how to repair leaking ponds during periodic
maintenance.
TABLE 3
Control of excessive water seepage in ponds (according
to soil texture)
|
Pond sealing method
|
Section
|
Soil texture
|
Silt content
|
Clay content
|
| Accelerating the natural process |
|
|
31
|
Variable but less than 50% sand
|
More than 50%
|
|
|
31
|
| Changing soil structure |
|
|
32
|
Wide range of particle sizes from sand to
clay
|
Present
|
More than 10%
|
|
|
33
|
| Lining the pond |
|
|
34
|
Mostly coarse particles
|
Very little
|
Less than 10%
|
|
|
35
|
| Adding high-swelling clay |
Bentonite
|
36
|
Mostly coarse particles
|
Very little
|
Less than 10%
|
|
3.1 How to seal the pond with organic matter
Light organic layer
1. A simple method that greatly accelerates the sealing of a pond
bottom is to spread enough cattle manure over it (at least 2 m3/100
m2) before filling the pond with water. Repeat this procedure several
times if necessary, at intervals of eight to 12 months, until seepage losses
become acceptable. After draining these ponds, refill them with water as soon
as possible to reduce the rate of decomposition of the organic matter that seals
the bottom pores.
2. If the dikes of a pond have been compacted very well, it may not be necessary
to seal them against seepage when you seal the pond bottom. However, if you
are not sure that the dikes are sound, it is best to seal them as well.
Gleization
3. If the bottom soil is too permeable to be sealed by this method, an alternative
is to create an impervious biological plastic layer in the
bottom and on the sides of the pond. Such an impervious layer is called a gley,
and the process of its formation is called gleization. Proceed
as follows.
(a) Prepare the pond bottom (and
if necessary the wet sides of the dikes) by clearing it of all vegetation, sticks, stones,
rocks and the like. Fill all cracks, crevices and holes with well-compacted impervious
soil.
(b) Completely cover the cleaned surface with moist animal manure,
preferably pig dung, spread in an even layer about 10 cm thick.
(c) Cover the manure well with a layer of vegetal material, preferably
broad leaves such as banana leaves. You can also use dried grass, rice straw,
soaked cardboard or paper, etc.
(d) Cover with a layer of soil about 10 cm thick.
(e) Moisten and compact very well.
(f) Wait two to three weeks before slowly filling up the pond with water.
Gleization

|
3.2 How to seal the pond bottom by puddling
1. A simple way to reduce water seepage, particularly if the pond bottom is
very dry, hard and has open cracks in it, is to break the soil structure
of the pond bottom before filling the pond with water. This is common practice
in irrigated rice fields, and is called puddling. Refer also
to Section 2.1, Water, 4.
Proceed as follows.
(a) Saturate the soil of the
pond bottom with water.
(b) Let the water soak into the
soil just enough to permit working.
(c) Break the soil structure by puddling with a hoe or plough.
Puddling by hoeing

|
|
Puddling by ploughing

|
| |
|
|
| 2. If a puddler is available, flood the pond bottom
and puddle the soil under water for best results. A plough can
also be used underwater. |
|
Rotary puddler

|
3.3 How to seal the pond bottom by compacting
1. If the bottom soil contains a wide range of particle sizes, from
coarse sand to fine silt and clay, and at least 10 percent clay (Soil,
6), it can be made relatively impervious by good compaction
alone. Proceed as follows.
| (a) Prepare the pond bottom (and if necessary the wet sides
of the dikes) by clearing it of all vegetation, sticks, stones, rocks and
the like. Fill all cracks, crevices and holes with well-compacted impervious
soil.
(b) Loosen the soil to a depth of 20 to 25 cm. If possible,
try to borrow a disc harrow or a rototiller from a neighbouring farmer.
A plough could also be used.
|
|
|
(c) As necessary, dry or moisten the loosened soil so that it
reaches its optimum moisture content for compaction, about
13 percent (see Section 10.2, Soil,6).
(d) Compact the soil surface into a dense, tight layer. You
should preferably use four to six passes of a
sheepsfoot roller. You may also use the tyres of a heavy tractor or a crawler-tractor.
(e) Check compaction carefully. If necessary, readjust the soil
moisture content and improve compaction. Refer
also to Section 6.2, Pond construction, 20.
3.4 How to seal the pond bottom with a soil blanket
Laying out a soil blanket
1. If the bottom soil contains a great proportion of coarse particles but
lacks enough clay and silt to prevent excessive seepage,
you can seal it with a soil blanket. Proceed as follows.
(a) Prepare the pond bottom (and
if necessary the wet sides of the dikes) by clearing it of all vegetation, sticks, stones,
rock and the like. Fill all cracks, crevices and holes with well-compacted impervious
soil.
(b) Build a soil layer about 15 cm thick over the entire
bottom area and over the wet sides of the dikes. The soil you use should be
well graded and contain at least 20 percent clay.
(c) Moisten this soil layer so as to reach
optimum moisture content for compaction (see Section 10.2,
Soil,6).
(d) Compact the soil layer well, preferably
by four to six passes of a sheepsfoot roller
(see Section 6.2, Pond construction, 20).
(e) Bring in additional clay soil to build a second layer about 15 cm
thick over the first one.
(f) Moisten and compact as before.
(g) Protect the soil blanket against rupture by:
- using layers of rocks or stones at the water inlet;
- spreading a cover of gravel 30 to
45 cm thick just below the maximum water level, if there is a danger of water freezing;
- avoiding working inside the pond
over the soil blanket when the pond is drained or fish are being harvested;
- not letting the soil blanket dry
too much and thus cracking;
- refilling the pond carefully as
soon as possible.
Note: try to obtain the clay soil required to build the blanket
from a borrow area close enough to the pond to reduce transport
costs.
Laying out a subsurface soil blanket
2. For smaller ponds or if you need to work inside the pond, you may choose
to use a method which provides better protection for the soil blanket.
Proceed as follows.
(a) Prepare the pond bottom (and
if necessary the wet sides of the dikes) by clearing it of all vegetation, sticks, stones,
rocks and the like.
(b) Excavate the pond bottom deeper to a depth of about 30 cm. Store
the soil close to the pond.
(c) Build a well-compacted layer of clayey soil
at least 5 cm thick all over the surface.
(d) To protect this layer, cover it with the original soil and compact the
soil cover.
Note: if seepage problems are suspected during
planning or construction, it would be cheaper to include this subsurface blanket
during pond construction. This step will make it easier to connect properly
with the clay core of the dikes.
3.5 How to seal the pond with a synthetic membrane
1. Thin synthetic membranes can also be used to reduce excessive seepage, particularly
in coarse-grained soils. Such a method has the advantages
of:
- reducing seepage to zero in all
types of soil; and
- providing a more dependable seal
than the previous method.
2. However, synthetic membranes have several disadvantages
which must be carefully considered.
(a) They are rather expensive.
(b) Their resistance to puncture
and breakage is limited.
(c) This resistance may be
weakened under the action of direct sunlight.
(d) The natural fertility of the
bottom soil will be lost, and it will take some time to develop it over the membrane.
3. Three kinds of synthetic
membrane material are most commonly used:
- black polyethylene;
- polyvinyl chloride (PVC); or
- butyl rubber.
4. Their relative properties and general requirements when being used to line
fish ponds are summarized in Table 4.
Note: the thickness of synthetic membranes is expressed
either in millimetres (mm) or in thousandths
of an inch (mils). To convert one unit to the other, simply remember
that 1 mil = 0.0254 mm, or approximately 40 mils = 1 mm.
TABLE 4
Relative properties and requirements of synthetic membranes
|
Properties
|
Thermo-plastic membranes
|
Elastomer membranes
|
|
Polyethylene (PE)
|
Polyvinyl chloride (PVC)
|
Butyl rubber
|
| Relative cost |
Small
|
Medium
|
High
|
| Ageing |
Good
|
Not so good
|
Good
|
| Resistance to impact |
Low
|
Medium
|
High
|
| Susceptibility to sunlight |
Poor to medium1
|
Medium to good
|
| Protection required |
|
|
Soil layer at least 15 cm thick
|
None
|
- Trampling by livestock, people, equipment
|
Soil layer at least 25 cm thick with bottom
7.5 cm very fine sand2
|
Soil layer 20-25 cm thick with bottom 7.5
cm very fine sand
|
| Joining or patching |
Heat, special cement, or tape
|
Solvent cement
|
Special cement
|
| Minimum membrane thickness |
|
|
0.20 mm or 8 mils
|
0.20 mm or 8 mils
|
0.38 mm or 15 mils
|
|
|
0.38 mm or 15 mils
|
0.38 mm or 15 mils
|
0.76 mm or 30 mils
|
| Placement in pond |
Lay with 10% slack
|
Lay smooth but slack
|
Lay smooth but slack
|
1
During manufacture, can be treated for increased resistance to sunlight
2 In some cases, a layer of geotextile is used to give additional strength.
This is a loose weaved synthetic fibre mesh which helps hold together the lower layer of
soil and acts as a backing to the membrane. It is laid the same way as the membrane itself |
5. To ensure zero seepage, the synthetic membrane must entirely cover the pond
bottom and the wet sides of the dikes. Since it is relatively easy to puncture
the membrane, it is especially important to clean both the bottom and the wet
sides of the dikes very well.
6. To line a pond with a synthetic membrane, proceed as follows.
(a) Prepare the entire pond area (including the wet sides of the dikes) by clearing it
of all vegetation, sticks, stones, rocks and the like.
(b) Fill holes and crevices with soil.
(c) If the soil material to be lined is too stony or of very coarse
texture, cover it with a cushion layer of finer material about 10
cm thick.
(d) All around the pond on the top of the dikes, dig an anchor trench
25 cm deep and about 30 cm wide, set at least 30 cm back from the inner edge
of the dike.
Position of synthetic membrane ending in anchor
trenches

|
(e) Lay a first strip of the membrane along the width of
the pond and along the dike. Watch for the following:
- choosing the correct slack for the membrane used (see Table 4);
- leaving 20 to 25 cm of the membrane in the bottom of the anchor trench at both ends;
- avoiding soil on top of the membrane;
- avoiding puncturing the membrane while handling it.
(f) Lay a second strip of the membrane in the
same way but allowing a 15-cm overlap for joining it to the
first strip.
(g) Carefully join this second strip to the first one, using
the appropriate method according to the membrane used (see Table
4).
(h) Repeat this process with as many membrane strips as necessary
to completely cover the pond bottom and the wet sides of the dikes.
(i) Backfill the anchoring trenches with well-graded soil and bury
the edges of the membrane, taking care to compact well.
(j) While laying the membrane strips down, cover the finished sections
for immediate protection by:
- first carefully spreading and compacting a 7.5-cm-thick layer of soil no coarser than
silty sand, and being very careful to avoid puncturing the membrane;
- then spreading and compacting a layer of available site soil at least 15 cm thick.
(k) In some cases the membrane is not covered. If so, you
should use a covering sheet of plastic, butyl or felt over the upper edge that
extends at least 20 cm below the pond water level to protect the main membrane
from heat and sunlight. The sheet can be dug into the same trench as the main
membrane.
(l) You should take special care around pipes or monks. Depending
on the membrane type, it can be sealed either by taping or cementing around
the pipe or monk. With monks, a finer mortar joint can also be used: ideally
the membrane should be incorporated during construction of the monk. Bring the
membrane at least 10 cm up the sides of the monk or around the pipe, and make
sure the membrane is not split around the joint.
Note: if the synthetic membrane is to be covered with a protective
soil layer, the slope of the wet side should be no steeper than 3:1; if there
is no soil cover, the slope of the wet side should be no steeper than 2:1.
Slope of wet dike sides

|
3.6 How to
seal the pond with bentonite
1. If your pond bottom soil contains a high percentage of coarse-grained particles
and not enough clay, adding bentonite to it is
another method of reducing excessive seepage.
What is bentonite?
2. Bentonite is a fine-textured colloidal clay with as much as 90
percent of montmorillonite. When exposed to water, dried
bentonite absorbs several times its own weight of water; at complete saturation,
it swells as much as eight to twenty times its original dry volume.
3. Natural bentonite deposits exist in several places around
the world, for example in the United States of America, Mexico, China and Western
Europe.
Selecting this method
4. Before selecting this method to seal your pond, you should locate a
satisfactory source of bentonite, as near as possible to your site
to reduce cost.
5. You should also ensure that the quality of the available bentonite is good:
it should contain the highest percentage of montmorillonite
possible (at least 70 percent). If necessary, obtain a sample first and have
it analysed in a soil laboratory. You may test the bentonite by placing it in
a small jar and adding water. Good bentonite should expand to several times
its original volume.
6. The water level of your pond should not fluctuate
too much. Soil treated with bentonite will develop numerous cracks
when it dries up. It is best if it always remains wet.
7. Whenever good bentonite is readily available, this sealing method offers
several advantages:
- it is cheaper than using some synthetic membranes such as butyl rubber;
- it is relatively easy to apply;
- it can offer a long-lasting solution to excessive seepage;
- unlike plastic membranes, it is not vulnerable to vandalism, it does not stretch and
break if the substrate sags under pressure, and vegetation can grow through it without
affecting its porosity.
8. However, bentonite treatment has several potential disadvantages:
- cost may be excessive if the transport distance is too long;
- it is more laborious to apply than a butyl membrane, and great care should be taken to
ensure complete coverage;
- it can be disrupted by cattle or eroded by running water unless well protected;
- burrowing animals such as crayfish or crabs and strong bottom-feeders such as common
carp can penetrate through the bentonite-treated layer;
- bentonite treatment is not advisable in highly alkaline soils;
- it should be used with care when the water contains salts such as calcium chloride.
Taking precautions before applying the method
9. Before using this method, it is safer first to make some preliminary
tests.
(a) Have a water sample analysed to discover its salt content.
(b) Have soil samples analysed for chemical composition and
texture.
(c) Request specialized advice from your supplier of bentonite:
which particular quality of bentonite do you require and at which rate should
you apply it.
Sealing a drained pond with bentonite
10. If the results of the above analyses of water and soil
confirm that conditions are good for using a particular kind of bentonite to
seal your pond, proceed as follows.
(a) Prepare the pond bottom (and if necessary the wet sides of the dikes) by clearing
it of all vegetation, sticks, stones, rocks and the like. Fill all cracks, crevices and
holes with well-compacted impervious soil.
(b) Dry or moisten the area so that the soil
moisture reaches its optimum content for compaction
(see Section 10.2, Soil, 6).
(c) According to the bentonite and soil laboratory analyses, uniformly
spread from 5 to 15 kg of bentonite per m2 : the better the
quality of bentonite and the more clay or silt your soil contains, the less
bentonite you will require. Use a marked grid pattern to help you spread the
bentonite on the bottom evenly.
| (d) Thoroughly mix the bentonite with the bottom soil
to a depth of about 15 cm. A rototiller is best for this operation but an
agricultural disc harrow can also be used.
(e) Compact the area well, preferably with four to six passes
of a sheepsfoot roller. You could also use other types of
compacting equipment (see Section 6.2, Pond construction, 20).
|
|
|
(f) If you cannot fill the pond with water immediately, you should protect
the treated area against drying and cracking. Use a good mulch*
of straw and hay on top of the surface and keep it moist if necessary.
(g) Protect areas where erosion could damage the layer containing
bentonite such as under the water inlet and around the pond where wave action
is thought to be the strongest (see Section 4.2).
Use gravel, stones, rocks and other available materials.
Note: when you plan to use bentonite to seal a pond and its
wet dike sides, the dike slope ratio should be no steeper than 3:1.
Sealing a full pond with bentonite
11. If you discover that seepage losses from a pond in use are excessive and
bentonite is easily available, you can seal the pond without draining
it. First check on this possibility by having water and soil samples tested.
12. At the pond inlet, throw bentonite in the inflowing water
at the rate of 5 to 15 kg/m2 of water surface, according to the results
of the bentonite and bottom soil analyses. You may also sprinkle the
bentonite on the entire water surface. The bentonite particles will
settle down on the pond bottom and penetrate the soil pores as the water seeps
through. As they swell, they will block these pores and reduce seepage losses.
Note: it is best to treat your pond with bentonite in the
absence of fish, because it is potentially harmful to their gills.
3.7 How to maintain earthen ponds
1. An earthen fish pond needs to be given most attention during the
first years of operation, because it is then that the unforeseen,
hidden faults come to the fore. Maintenance should therefore be carried out
continuously from the beginning (see Sections 16.1 and 16.2).
2. With earthen ponds and in particular with dikes, you should
expect several kinds of problems, which you should take care of as soon as possible.
(a) Surface erosion of the dikes is usually caused by rain
trickling down the side slopes. Protect these slopes with a healthy cover of grass (see
Section 4.4).
(b) Erosion of the wet side of the dikes at the
water surface level mainly attributable to strong wave action may justify additional protection (see Section 4.3).
(c) Part of the soil may slip down from the slope in some
places, most frequently resulting from bad compaction, drenching of the dike
or quick water discharge. Replace the slipped soil with well-compacted horizontal layers
of soil.
(d) Part of the dike may slump, resulting either from bad compaction
or from incomplete removal of organic matter from the dike's site. Loosen the
surface soil of the dike top, moisten to optimum moisture content for compaction,
add a layer of good quality soil and moisten again if necessary and compact
well.
Protect dikes with grass cover

|
Replace dike areas which slip or slump

|
3. It a dike breaks at one point and a gap develops, the water
level must be lowered immediately to a level below the gap.
Lower water level and repair

|
4. Then carefully repair the dike as follows.
(a) Widen and deepen the gap slightly to expose fresh and clean
dike material. Eliminate all organic matter that might be present, such as roots.
Make irregular cuts to give the repair a good foundation.
(b) Moisten the old dike material, and pack in layer after layer of good quality
new soil. As you build up the new dike section, give particular attention
to the junction of the old soil with the new soil.
(c) If a clay core is present, rebuild it also
as you progress upwards, layer by layer (see Pond construction, 20).
5. Leaks may develop locally in dikes for various reasons,
such as accidental damage, the presence of a rotting piece of root or the burrow
of an animal. To repair local leaks, you can proceed in the following way.
(a) Lower the water level, slightly widen the leak and fill
it with well-compacted clayey soil. You can also use a mixture of clay
and hydrated lime (see
Section 4.6), for example in the proportion of 4 to 6:1, which will set
more firmly. In some areas, hydraulic limes, made from clayey limestone*
(10 to 30 percent clay) can also be applied directly.
(b) If the leak is not too large, throw a certain amount of
clayey soil into the water directly above the leak. You can also use sifted cinders (less
than 2 mm in diameter) or a 5:1 mixture of finely grained soil with bentonite
(see Section 3.6).
(c) For emergency use, you may also apply a
section of polythene sheet, well weighted down with soil.
6. In tropical countries, particularly during the dry
season, termites may establish themselves in the dike of a pond. The dike becomes weakened
by underground galleries, which may result in severe water leaks and even breakages. To
eliminate termites, proceed as follows.
(a) Partly open the anthill at the top.
(b) Pour used motor oil into the galleries. If available,
use xylophene, because it has a stronger effect.
(c) Repeat this treatment each day for one week.
(d) Close the galleries with clayey soil, moistening as
necessary and compacting well.


